Fireplace feelings

Bring on the fall. We’re in desperate need of some positive change. It’s been a rough couple weeks in the Kimmerling household.

Ivy’s blood pressure was way too high for her to get cleared for fall sports so we began a medical cat and mouse chase to find the cause. Results? She’s got kidney abnormalities that caused damage that caused high blood pressure. She’ll be on medication for the rest of her life. Lord have mercy. Jesus have mercy.

Skylar made a poor decision which resulted in her loosing the team spot on her favorite sport. Which was devastating for her teen brain (and her peers are really cruel). Positives: 1. I have raised a child that will tell the truth to authorities. 2. She will learn a meaningful life lesson salted with humility. 3. I’m so proud how she has handled it. It still sucks (for all of us)- and I wish there was a measure of grace given for teenage screw ups but “your will, not mine be done.” Lord have mercy. Jesus have mercy.

Personally, I’m emotionally exhausted with all this drama. So sitting with my favorite cup of Joe and watching my glowing fireplace on this crisp morning is all I can do right now and hope that fall brings something positive. Lord have mercy. Jesus have mercy.

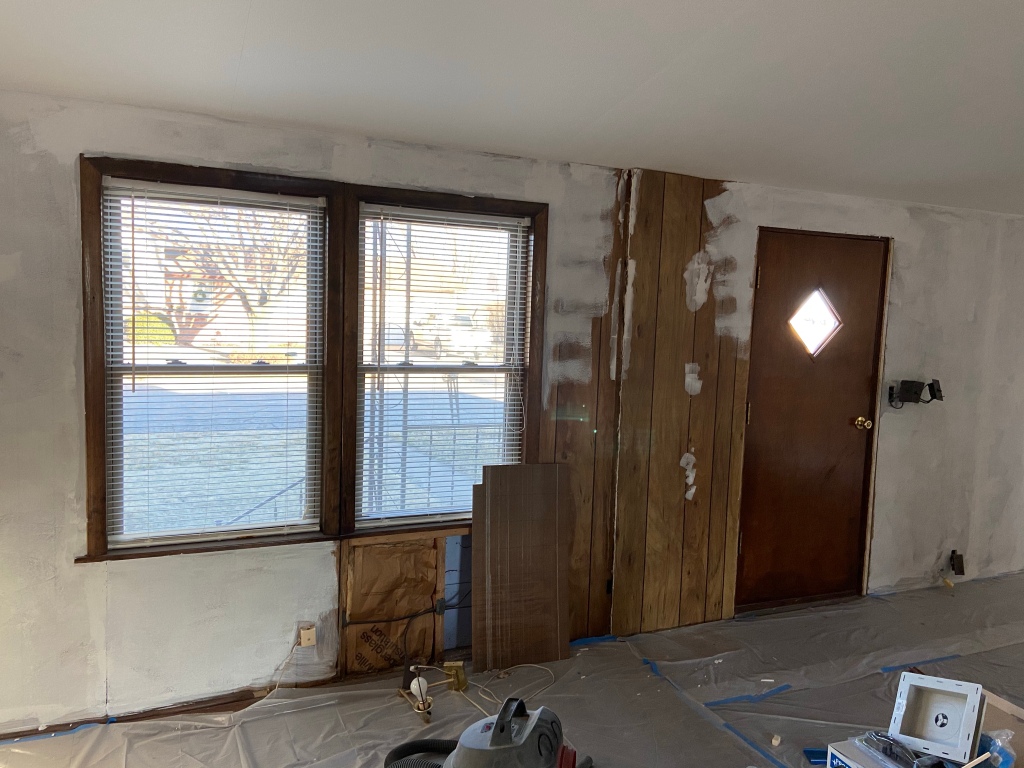
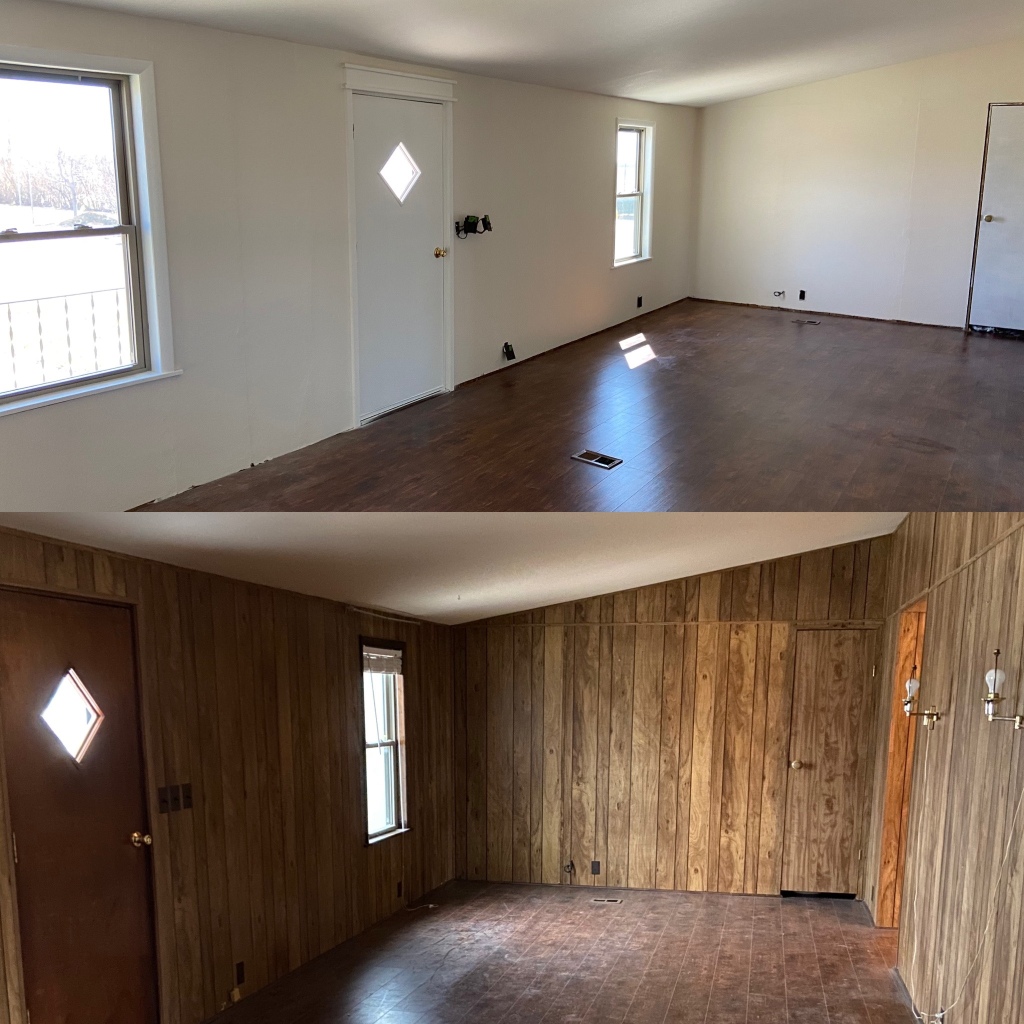
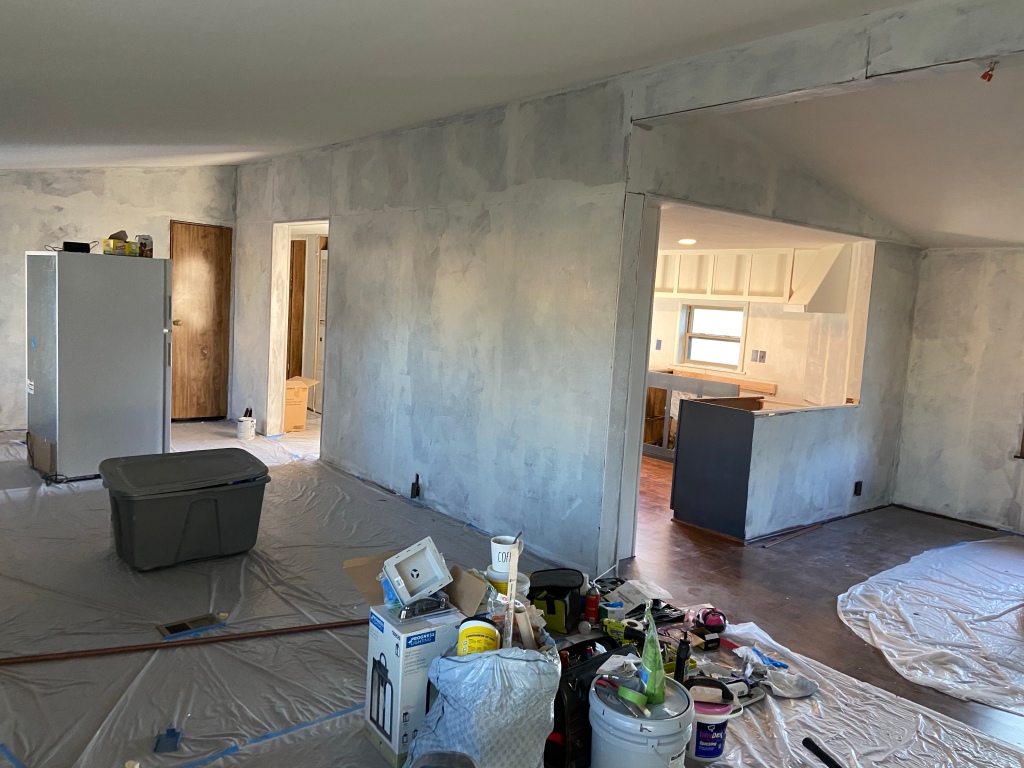
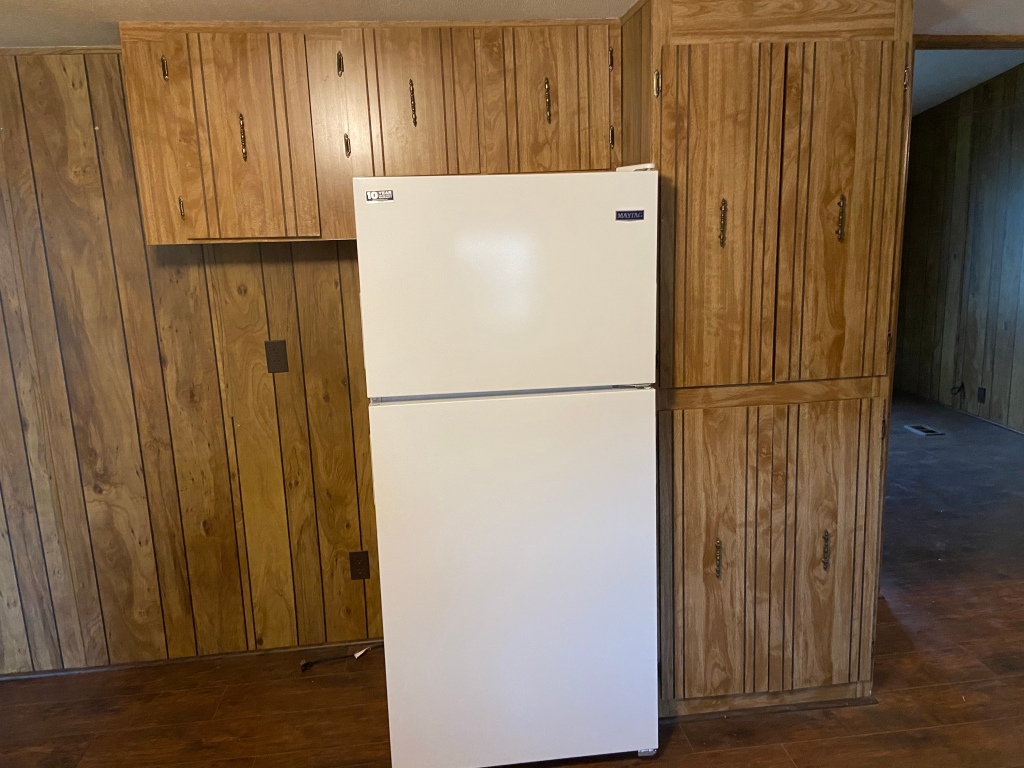
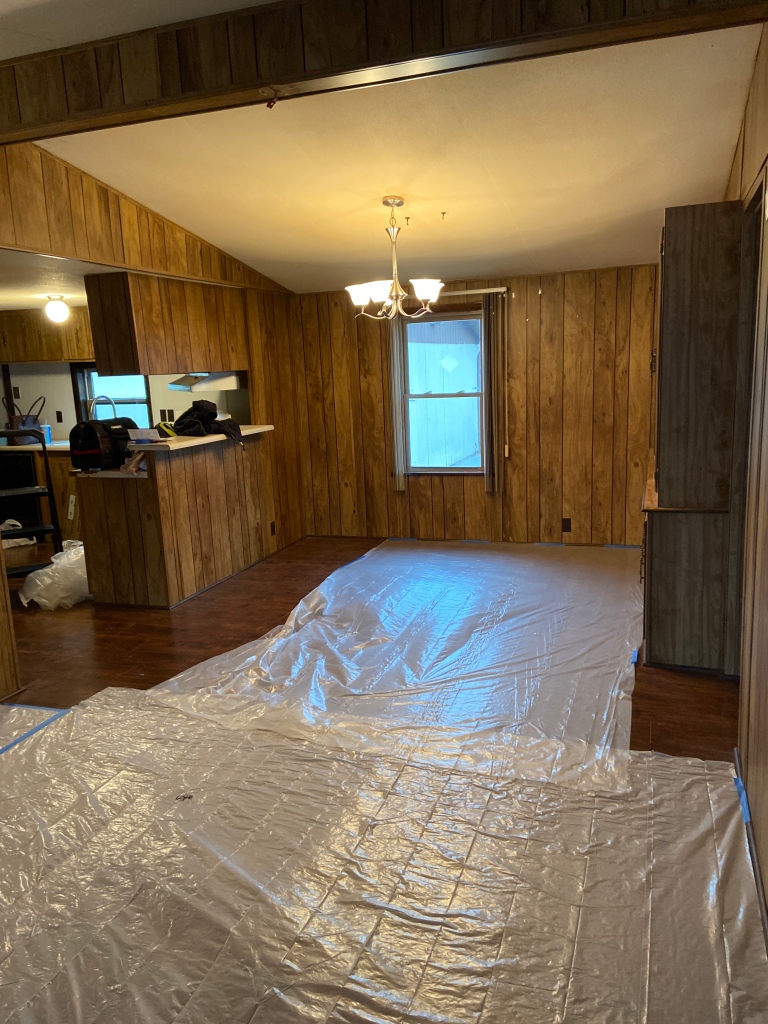
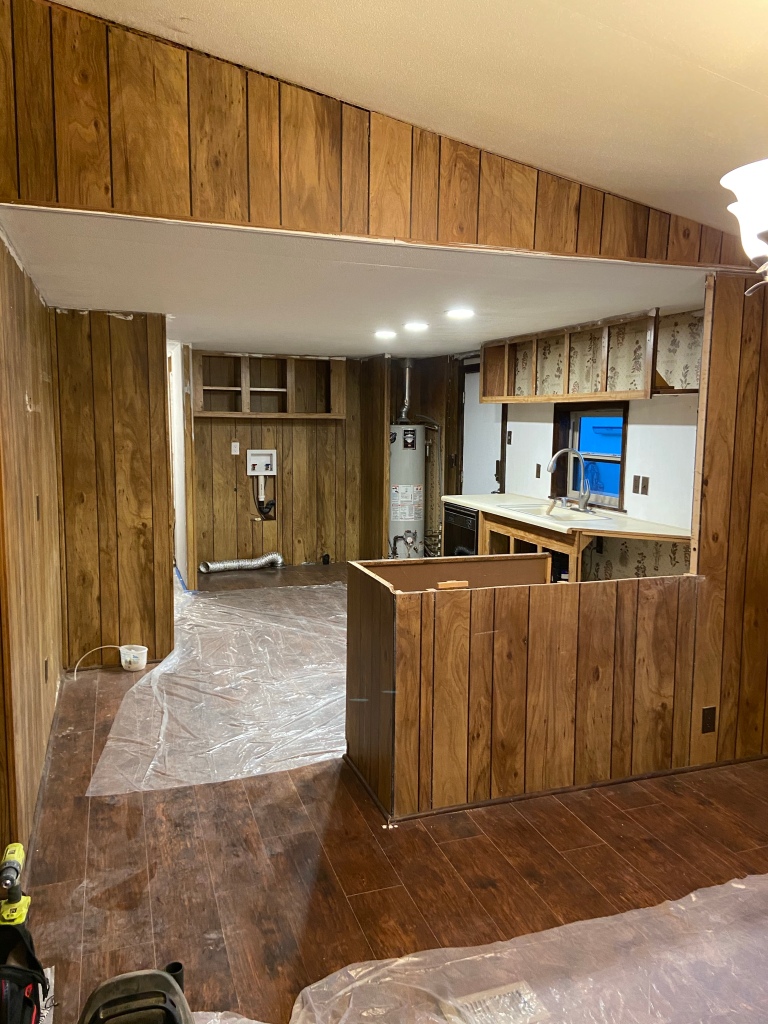
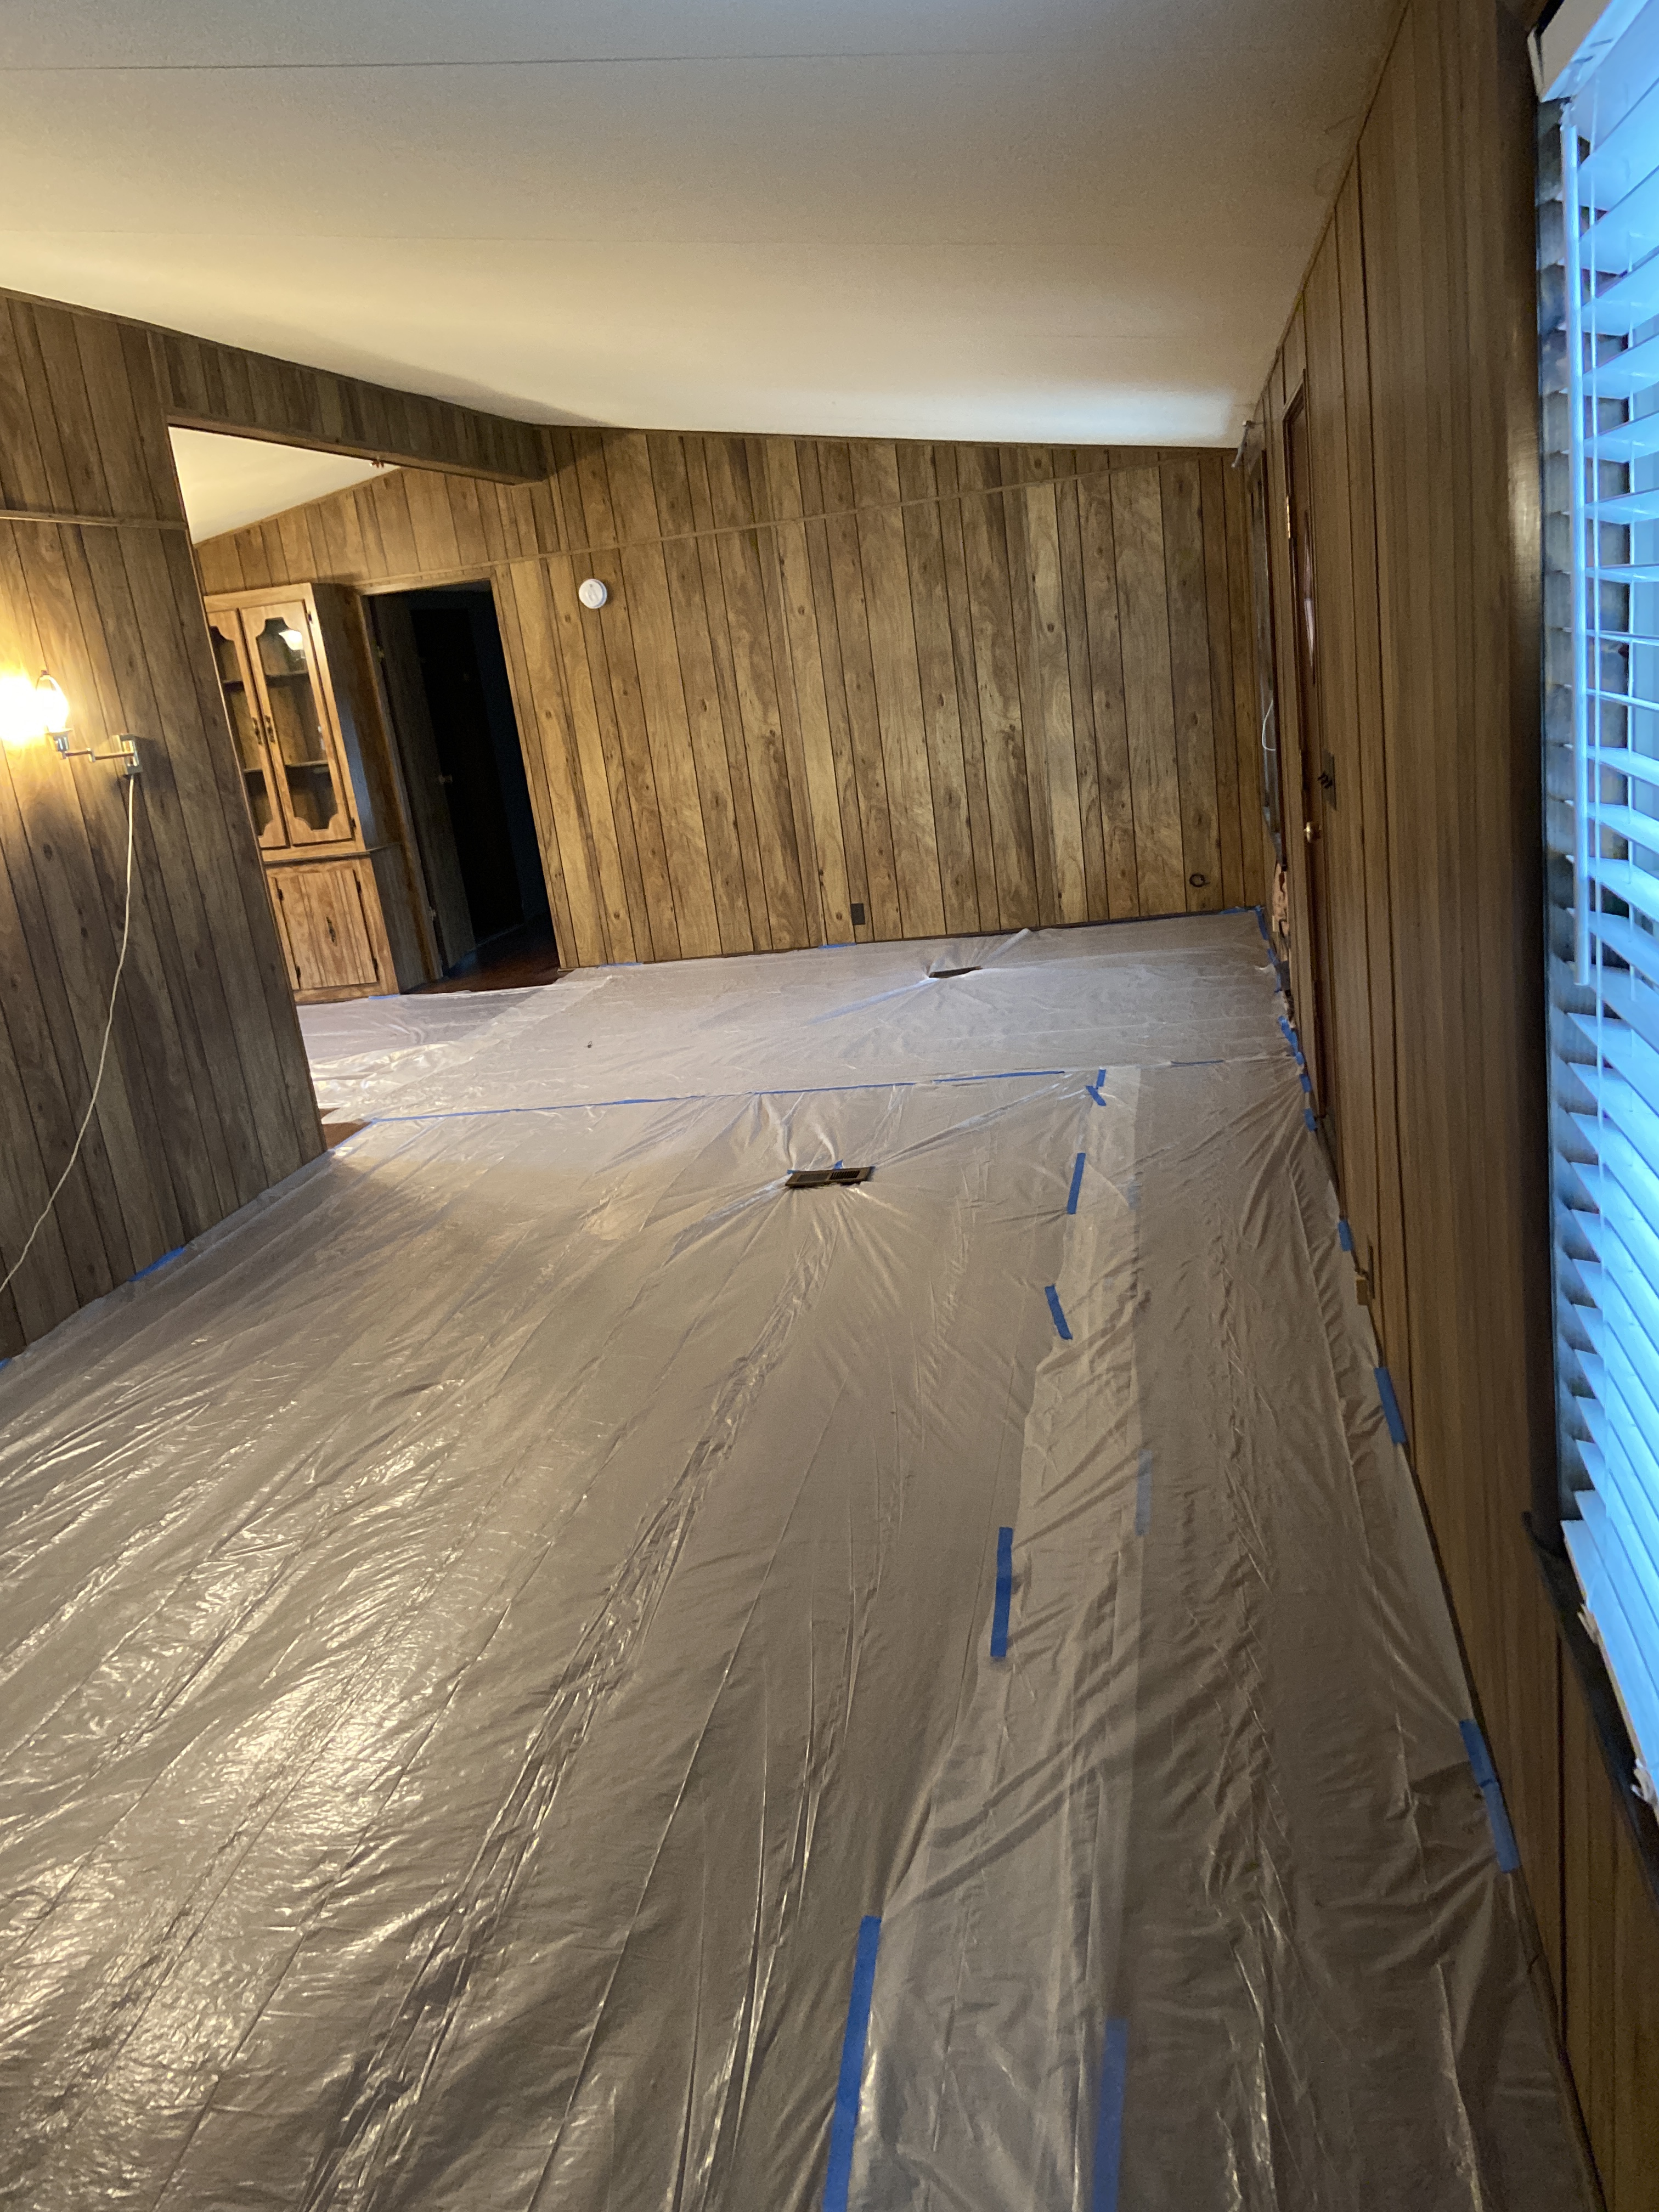
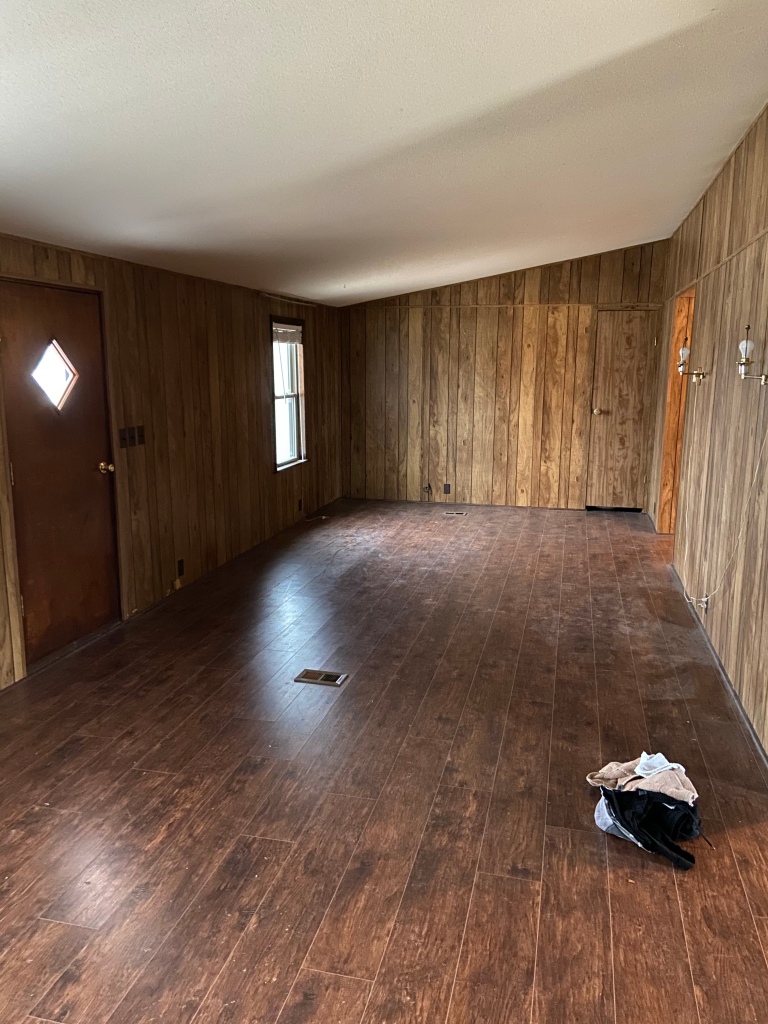
Before living room (upon closing)

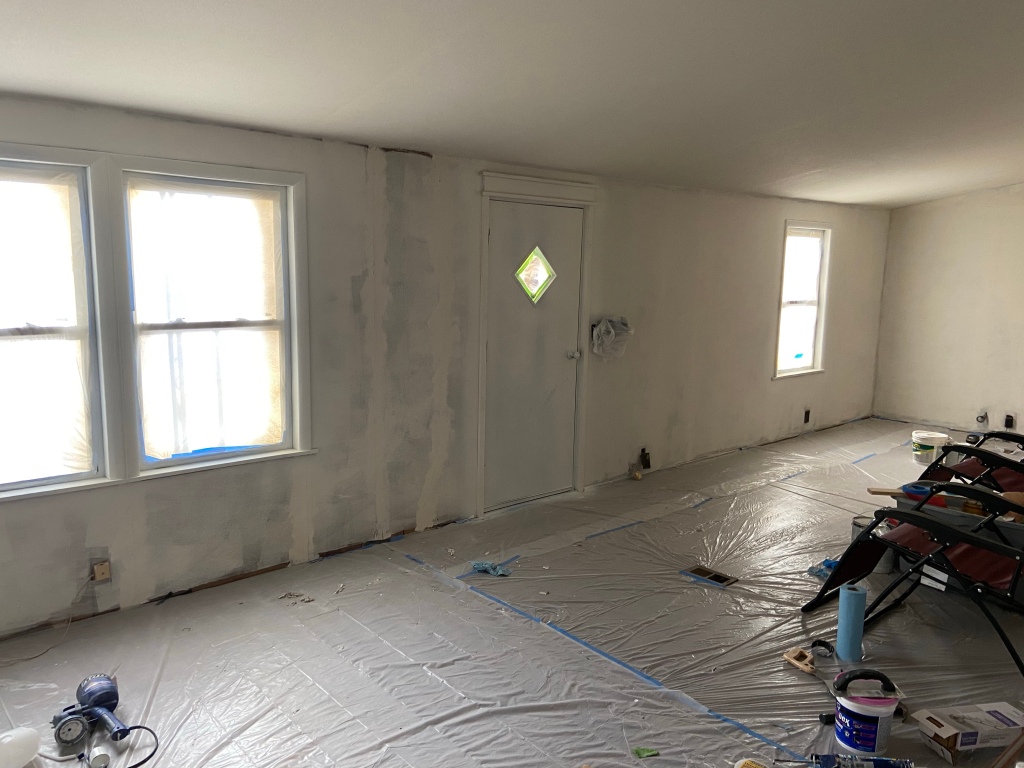
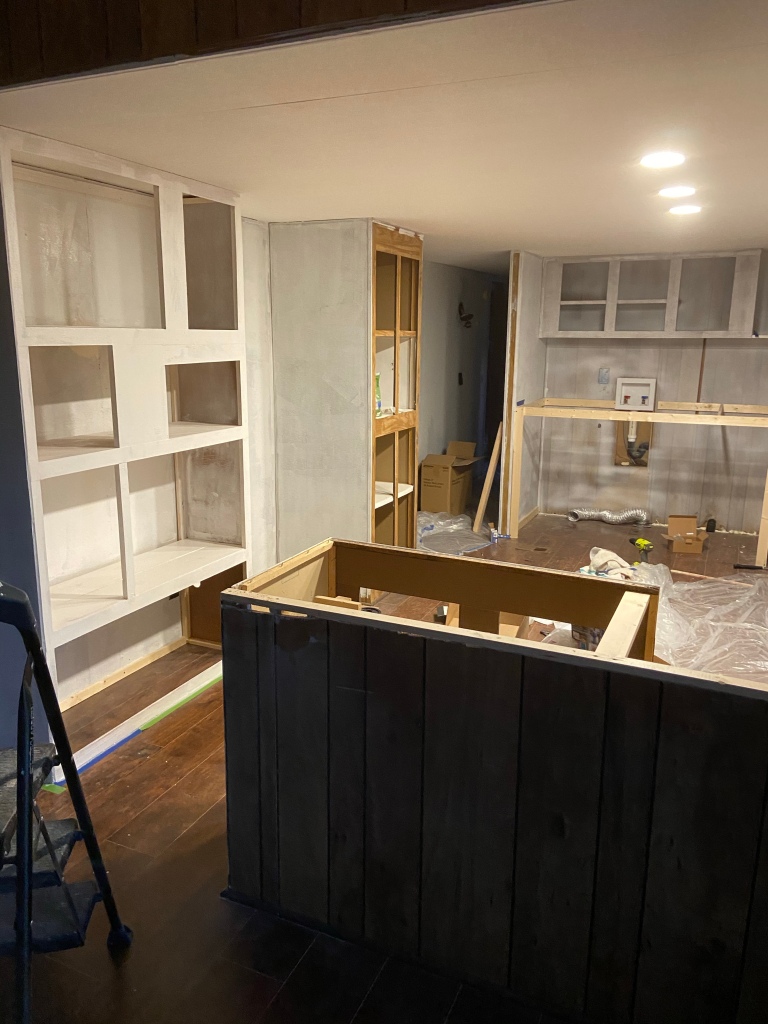
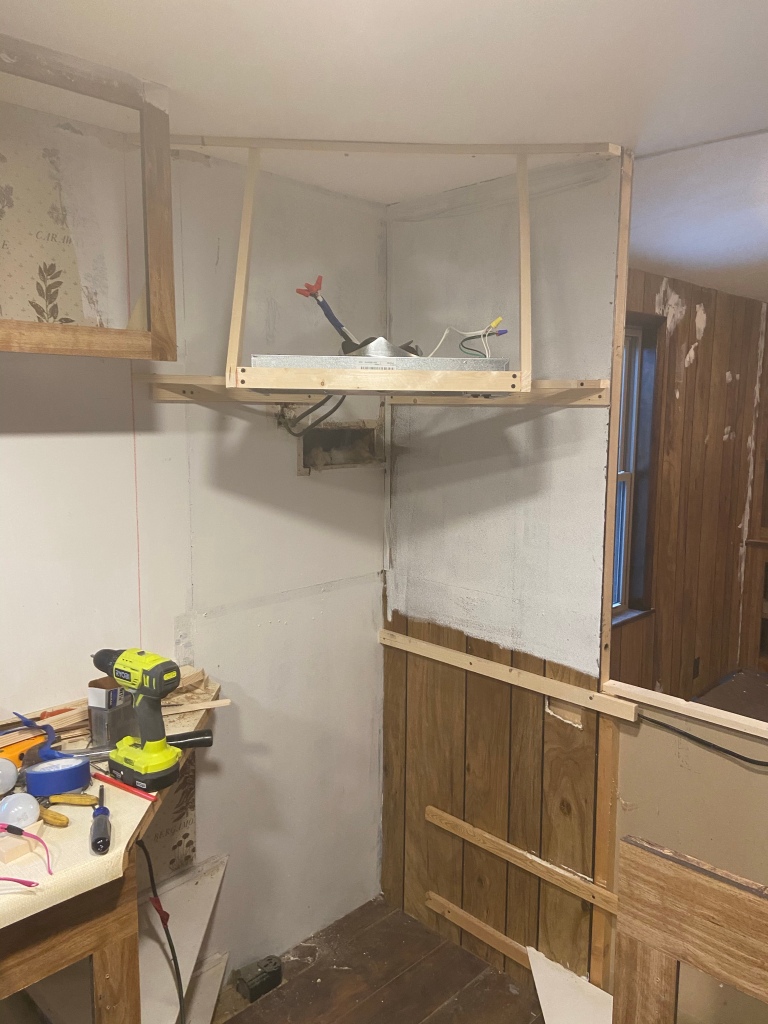
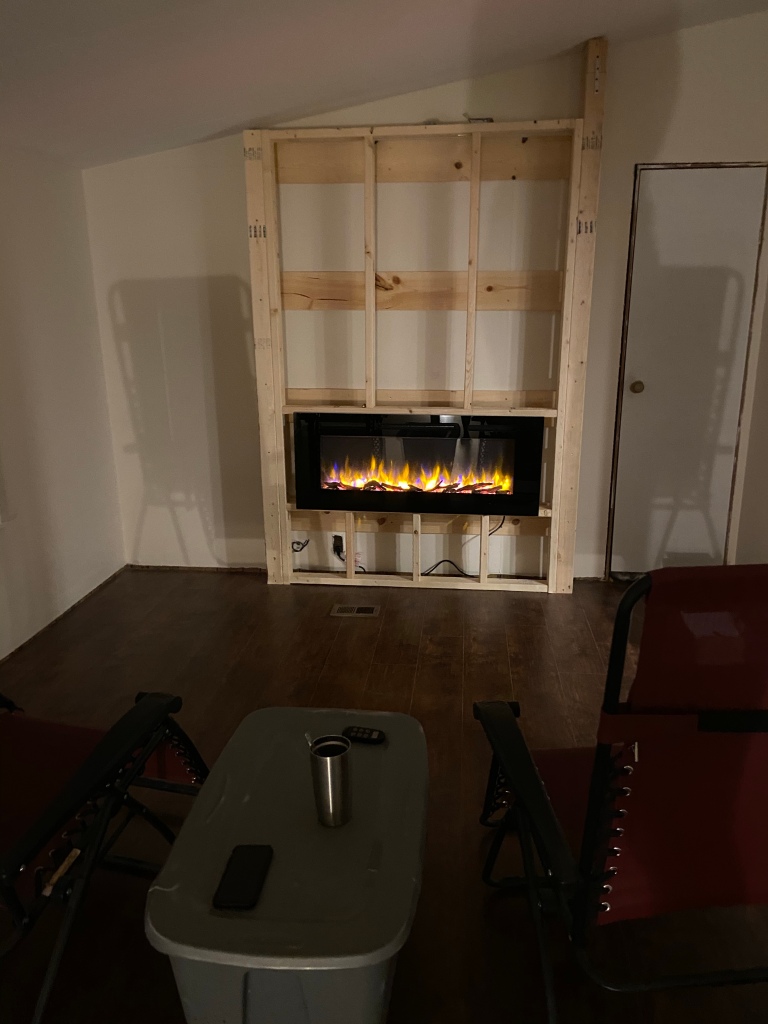
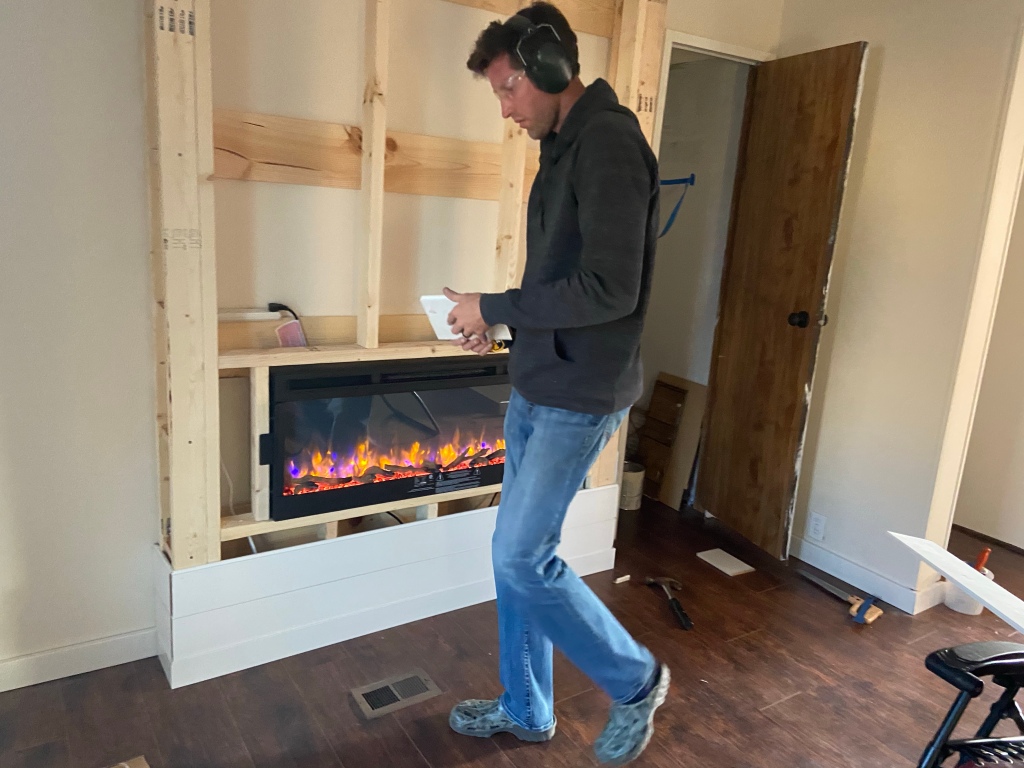
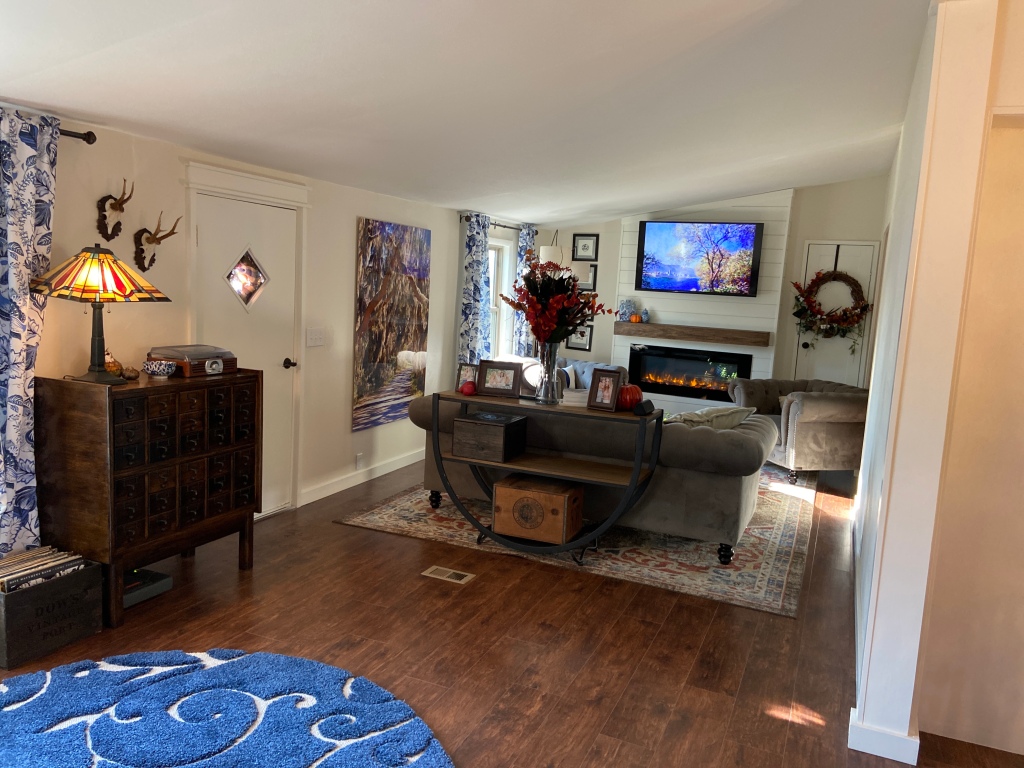
After painting the ceiling, spackling, texture and walls, we started on the fireplace. This began over the COVID-19 spring break “month”…

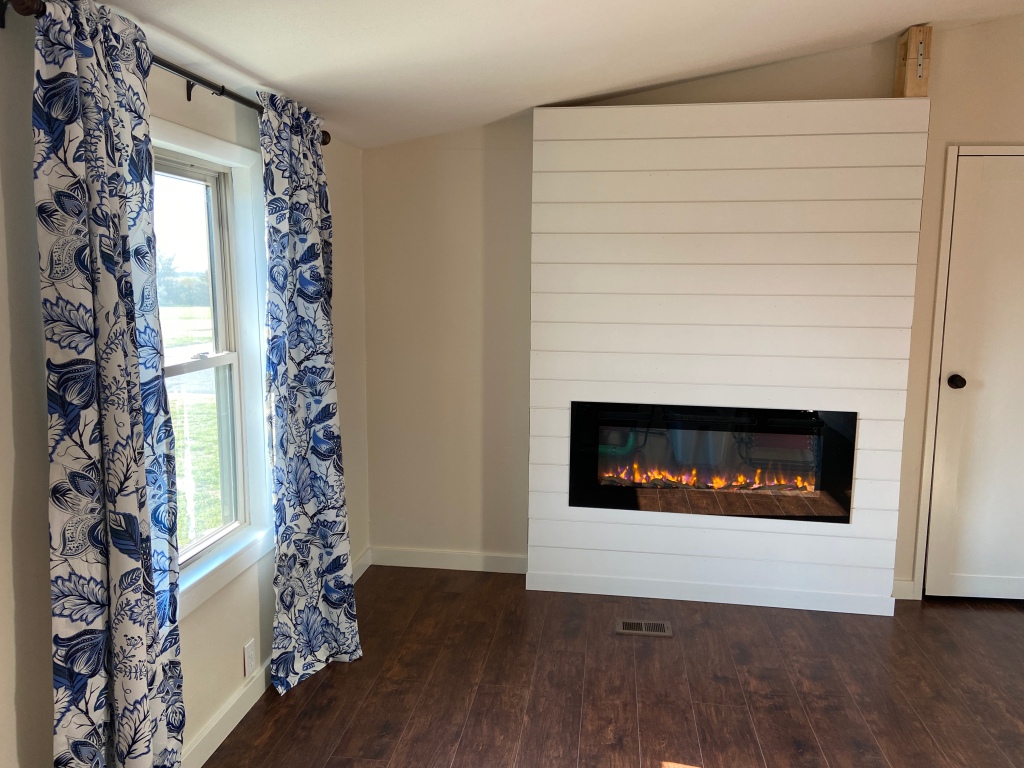
We bought the PuraFlame Alice 50 Inches Recessed Electric Fireplace from Amazon. I love the remote feature and that it doesn’t have to put out heat when you just want the ambience. http://www.amazon.com/dp/B01M73WPQ7/ref=cm_sw_r_cp_apip_v8xO83wEH4wHE

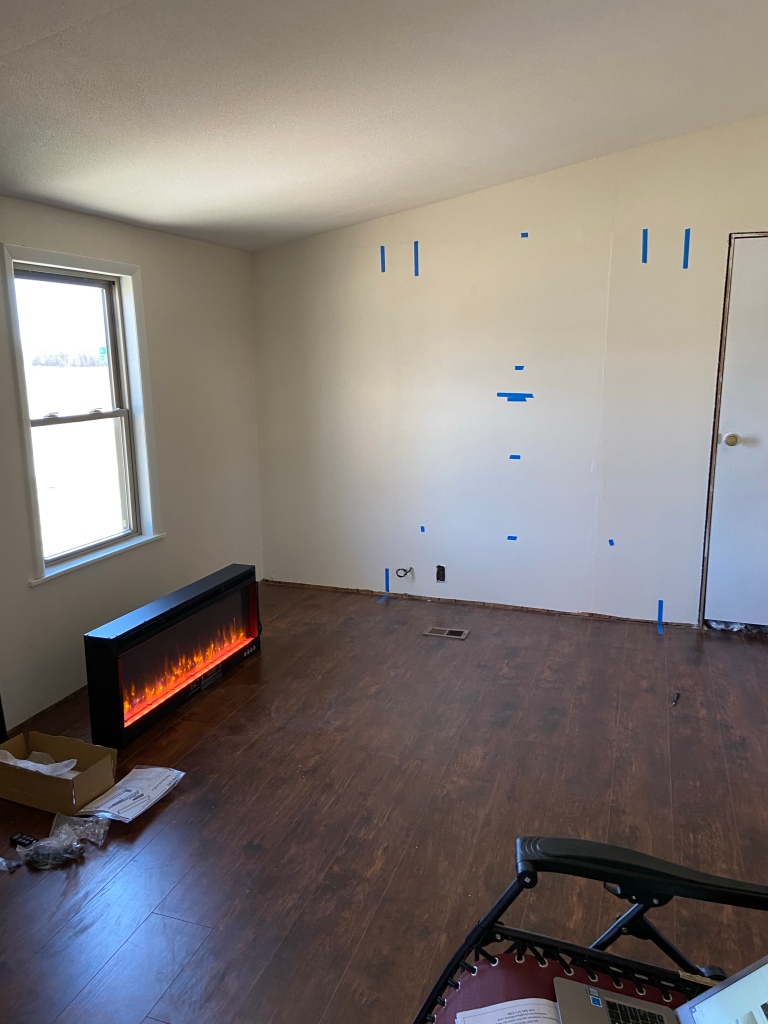
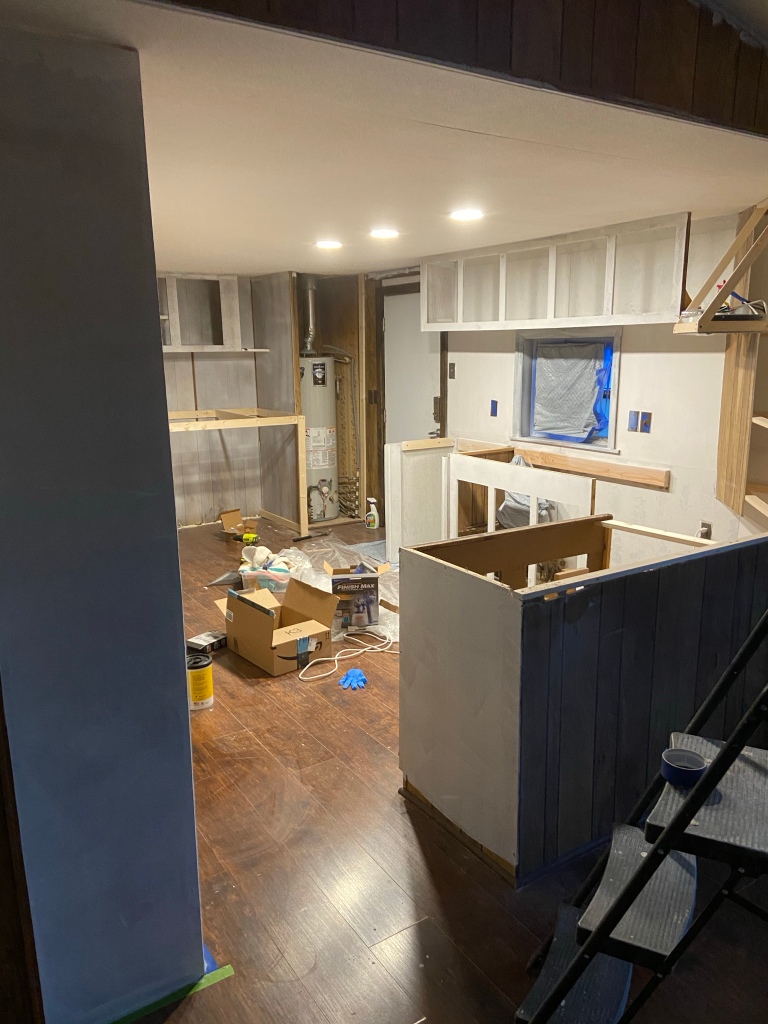
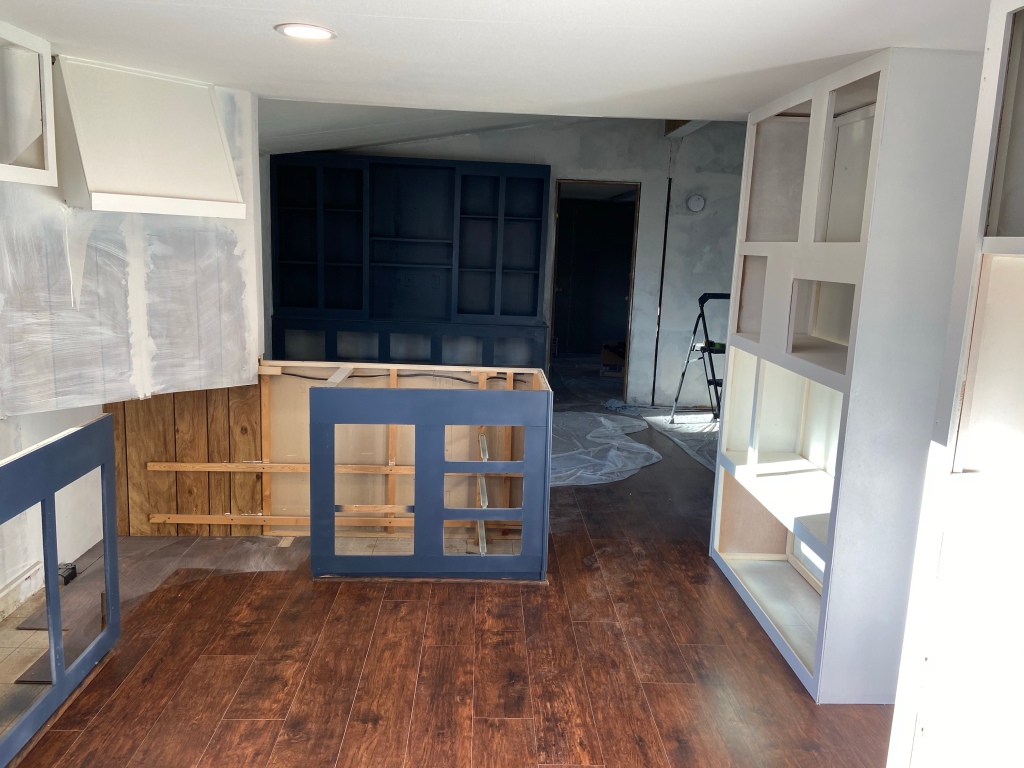
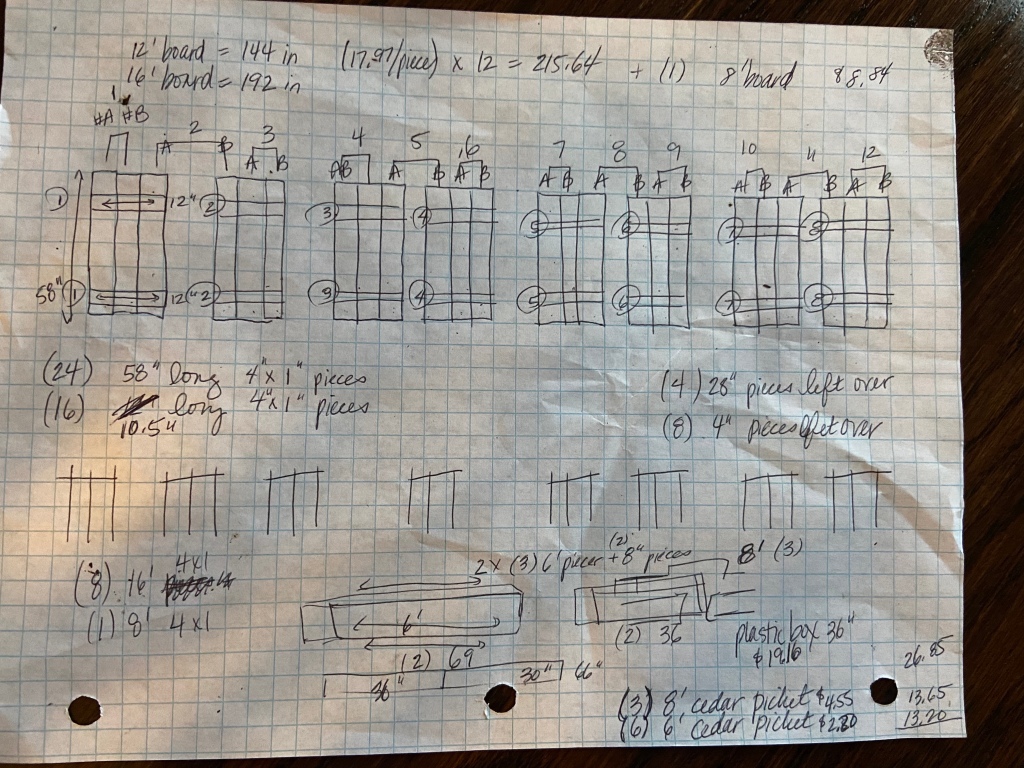
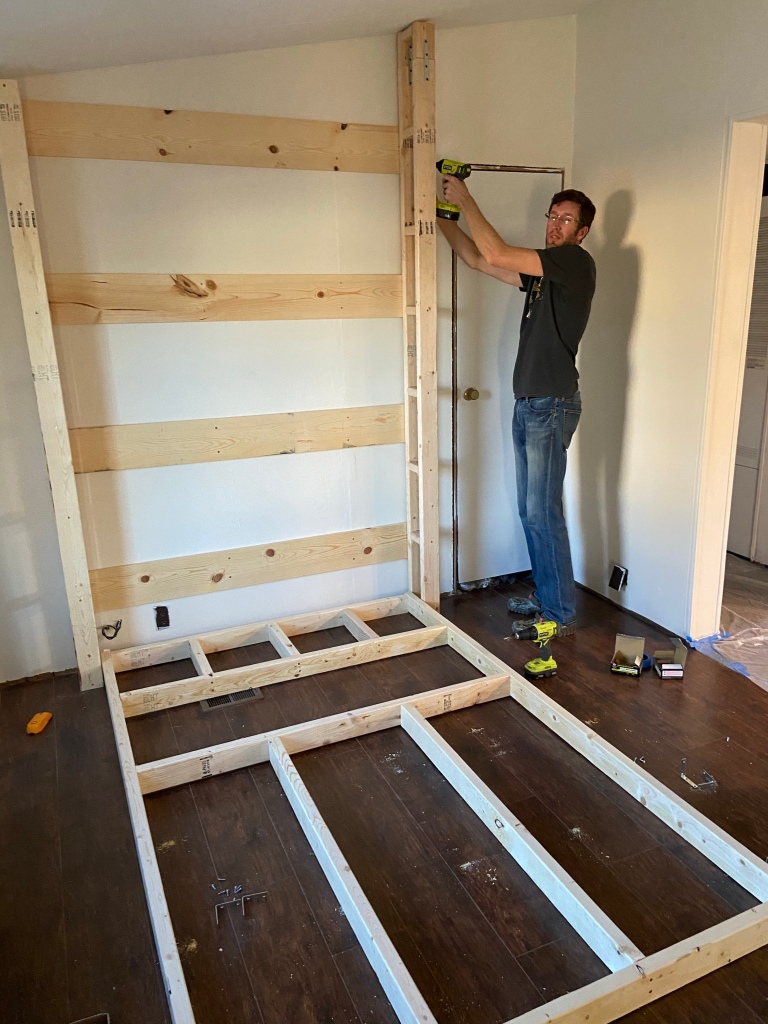
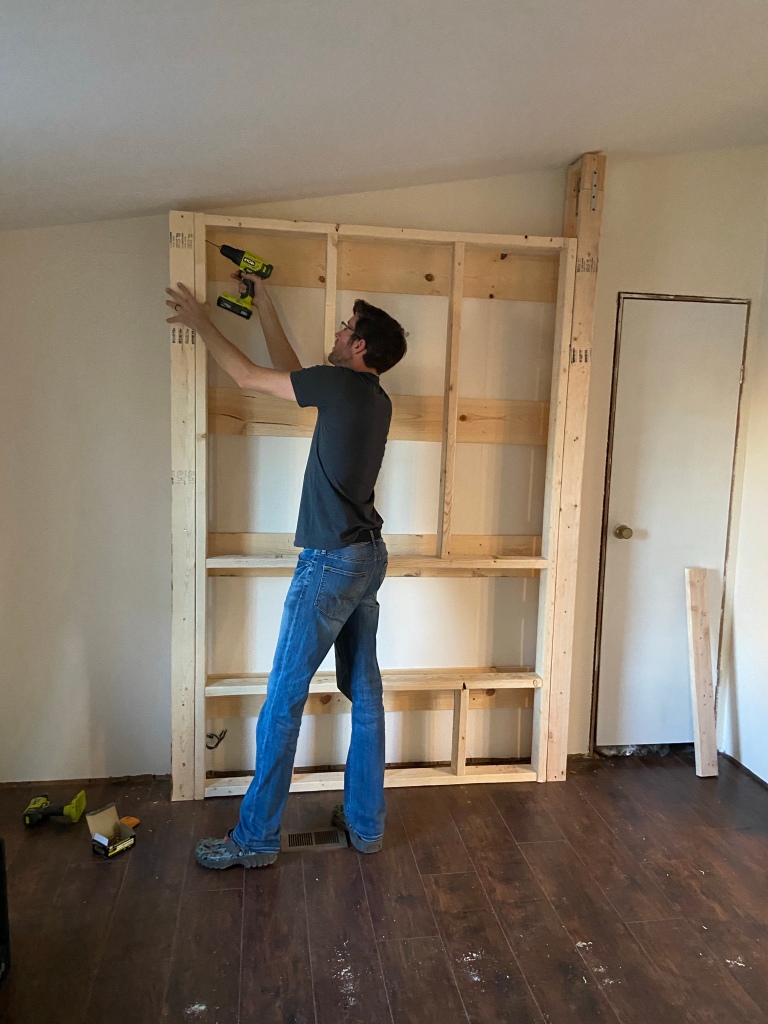
After taping out the general dimensions of the fire place and tv mount, Eric got busy on building the frame based upon this blog… https://www.bloomingnest.com/installing-a-fireplace-our-new-samsung-frame-tv/

I decided the doors from the living areas needed something extra… https://blog.jennasuedesign.com/2014/07/master-makeover-diy-plain-to-paneled
And the old electrical outlets needed to go away too… then we added the new baseboards.

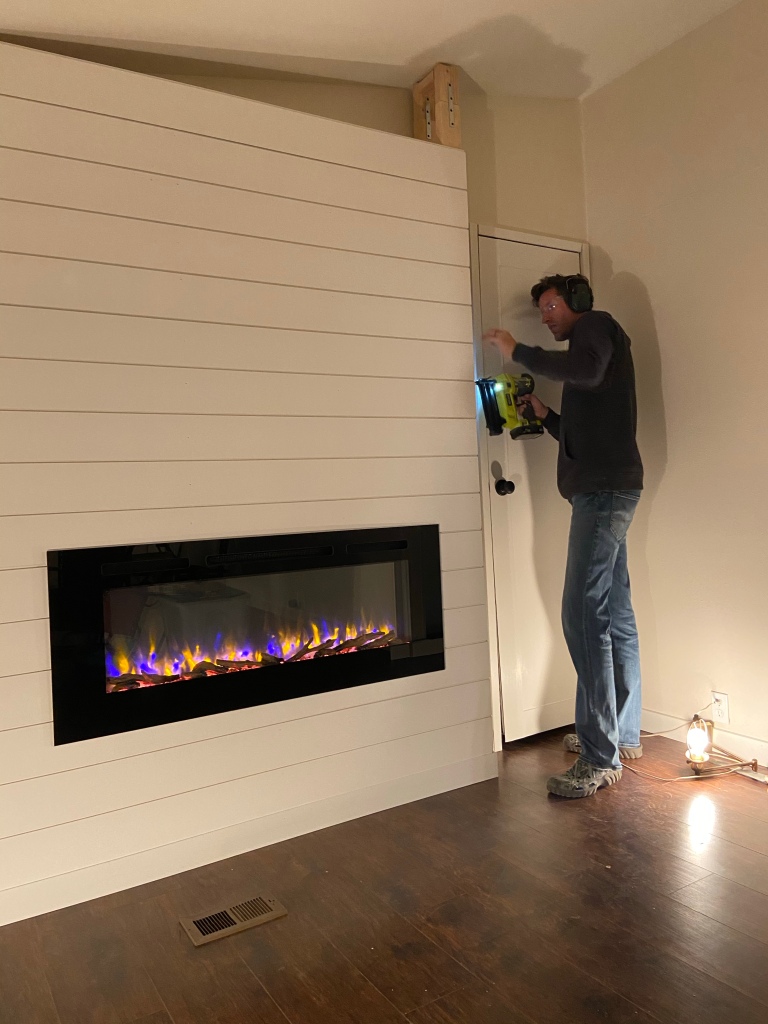
We ordered shiplap from Home Depot (Krosswood Doors 0 .472 in. x 5.5 in. x 96 in. Primed MDF Shiplap Interior Siding (8-Pack) and it was pretty simple installation.

We made sure the tv was properly mounted and the cords ran to the closet before we finished the top and trim.

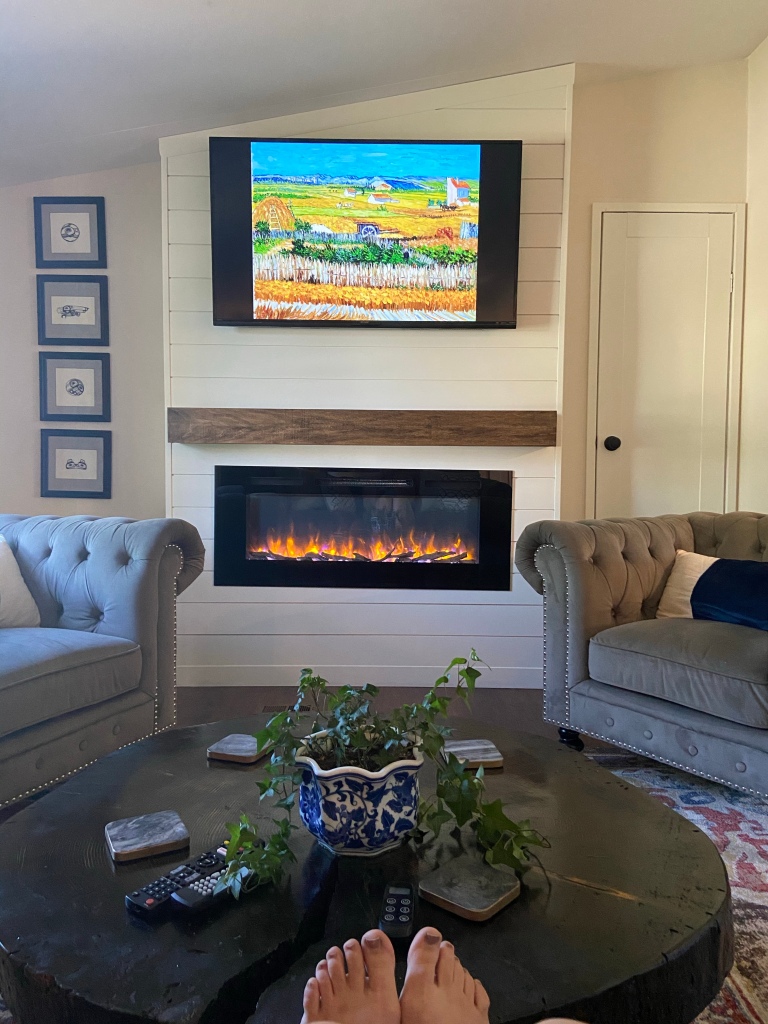
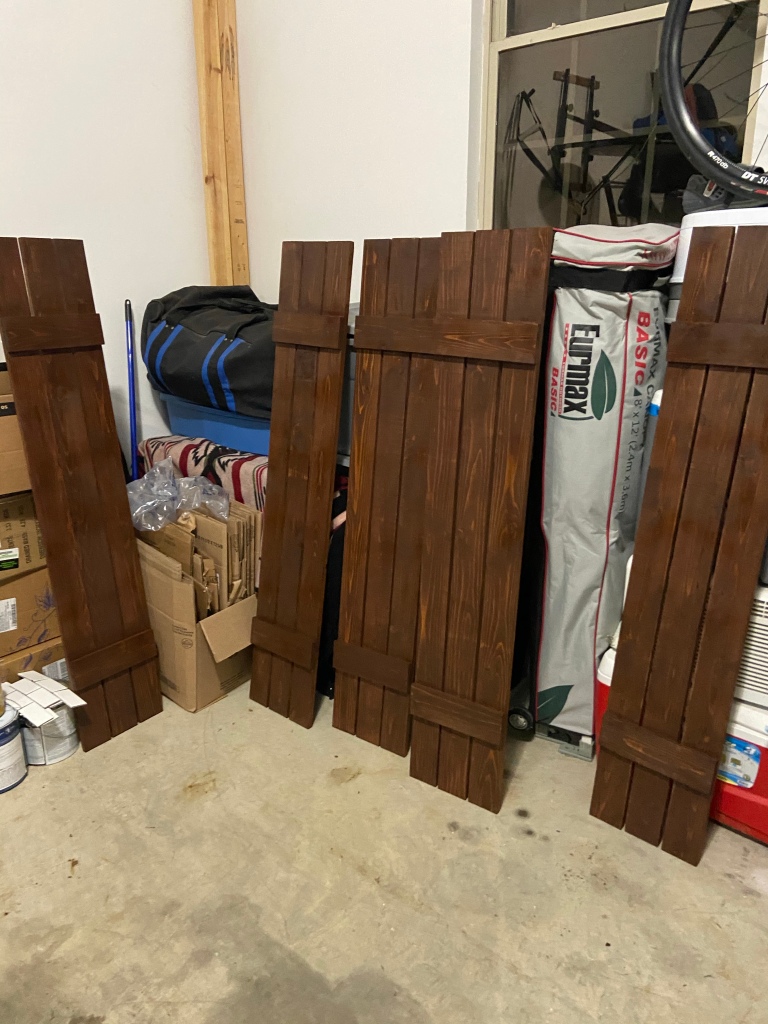
The floating mantel we made from board stained espresso following this guide: https://www.domestically-speaking.com/rustic-fireplace-mantel/

With love, DK

Bathed in green

I needed this break. A green one. To enjoy the scenery of spring and not wield hammer for a while. On our way home to Tennessee we stopped for a couple days at our favorite resort, Big Cedar Lodge near Branson, Missouri, to rest and recharge. It feels like vacation but more quiet- nothing is open and there are only 9 other people on this vast property.

Green. “It’s the color of the Emerald Isle, the hue of sickness and envy, and a shade associated with grotesque monsters. And its most universal interpretation conjures imagery of nature, a vibrant symbol of the environmental movement and healthy living. Green, the mixture of blue and yellow, can be seen everywhere and in countless shades. In fact, the human eye sees green better than any color in the spectrum.

This, along with many other facts about this earthly color, makes it an essential part of our everyday lives.” Eric said it’s been his favorite color since childhood. So no wonder Eric and I are drawn to it and used it in our master bath & bedroom.

Master bath before
Master bath before

I’m not naturally creative. I’m a thief. A friend once told me that in design there was nothing new under the sun. So I sift through things I like and that’s where these ideas come from. I love Pinterest- I pin so many things I like – regardless if I will ever use them anywhere. So if you ever followed me on Pinterest you might be like “Darci? are you expecting? Or who is getting married? Are you planting a vegetable garden? Are you moving overseas? Or why do you need that” oh yes, it seems random enough but they’re all things that catch my eye.

The master bath was inspired by two photos…

To stay in my budget, I decided to keep the chrome tub combo & faucet, sink & cabinet and just focus on color change.

After some convincing, I got Eric to board and batten one wall, then two, then I learned what the phrase “scope creep” meant as he when back for me lumber to complete all the walls in the small bathroom (insert inner smile). There are plenty of diy on how to faux board and batten out there- it’s as easy as nailing boards to a wall and painting them and the wall the same color.

We used common 1×2 boards for the verticals and 1×3 for the top to keep the cost down but if I would have had it to do over I would use the primed mdf boards in the same sizes- they would have been smoother and not taken so many coats of paint (just plain white semi gloss) in the end. Right now my board and batten is pretty rustic looking compared to what I had imagined.

The light fixture over the vanity was not centered or high enough for a single mount fixture so I decided to move it and add another for sconces I bought on amazon.

I should have used a stud finder before I made the first hole with my Sheetrock saw. To say I was frustrated when I couldn’t get my hand from one hole to the other to grab the small piece of wire (left over from the kitchen ceiling light project) is an understatement.

I eventually had to root around in the wall with my drill bit to find the stud that separated me from my goal. After wiring was installed and tested, I patched up the original hole and my wiring “expedition.”

And then green paint. First coat of “Vining” by Behr Ultra matte finish.

First view from the Master bedroom, also green (another post is coming).

In the end it look 3 coats of white on the board & batten and 2 coats for the green. I love it. We also purchased this cool standing ladder shelf for additional storage from amazon. And the rug I found on eBay (seller rugemporium240 has great rugs).

When we come back, I’ll bring a picture project I’ve been thinking about along with some other art & towel hooks and we’ll be in business.

Stay safe.

With love, DK

Tile teamwork

Last week, wow. It’s been a week. Easter week. I’m sure everyone can say the same. We’re living in strange times.

Reminds me of when Mary Magdalene “saw Jesus standing there and….well, she thought it was a gardener…no offense to gardeners but Jesus couldn’t have been looking all that tidy and impressive if she mistook him for a gardener: And here’s the thing: I like to think that Mary Magdalene mistook the resurrected Christ for a gardener because Jesus still had the dirt from his own tomb under his nails” (https://www.instagram.com/tv/B-4fIPvHnsE/?utm_source=ig_web_copy_link )

I feel like a gardener this week- not outside work but lots of inside stuff. I haven’t worn makeup or clothes without paint stains on them in a month. My nails are mangled and my skin is dry and I can’t seem to ever stay clean even after a shower- dust abounds with no matter how much sweeping. We’re living in a construction zone- so much great progress but I haven’t gotten it down to show you until today.

Last week, Eric decided he was ready to tackle the backsplash. So we looked at options on his laptop on Thursday and ordered them that night. It normally takes me longer to make a decision, not him. On Good Friday (the next day) we drove the approximately 3 hours (one way) to Wichita’s Floor & Decor store to pick up our order… because what else did we have to do that day… and it would save us $100 shipping.

Even the Floor & Decor store had made changes- instead of enjoying a leisurely stroll through the isles of beautiful Carrara, vinyl plank and granite slabs- you order tile like McDonalds’ drive through.

They loaded our order directly into the trunk and with a roll through order of brisket at fantastic BBQ joint we were back on the road to home. We did stop at the Hays homedepot and rent a tile saw for 24 hours. The previous owners left us tile adhesive and spacers so that was even more added savings for the day!

Before tile

We then laid the San Georgio Toscana Ceramic Tile (4×12 pieces) out approximately where they’d fit on our backsplash because with 4 boxes there was duplicates in the pattern and we liked the lighter pieces more than the dark greys.

Eric used the wet tile saw while I spread adhesive and stuck the pieces with the spacers into place.

It really was the “easiest” project with the least amount of needed “creative solutions”. Of course I used two outlet boxes instead of a double which will require creativity in the future (insert face palm). But it really looks quite good for amateurs.

(My dog, misty enjoying a furniture free space while we work with the door open)

Eric then cut out 2 boards to fit above the Landry countertop and tiled them. We had a hard time keeping them from warping so we weighted the tile down overnight.

They still need some touch ups to the trim, but it accomplished my prime objective- to cover the water valves unsightly back wall (and still be removable if needed).

We’re wrapping up indoor projects here and will head back to our Tennessee house for some much needed R&R (for this gardener). In preparation for all the “gardening” that will be waiting for us when we get back.

With love, DK

Kitchen conundrum

I’ve been waiting to post until we actually had a project completely finished -but you might never get to read another post for a while. None of what you’re about to see is perfect, just like I’m not. I’ve got scars and uneven places just like all of my work in this house. “It’s just better than it was before” has been my mantra and puts to mind my own transformation in this process.

From where we left off last post, the kitchen bases were painted as well as the built in.

View from the south (look at me using directions!)
View from north
Cabinet fronts laid out in garage

I put the cabinets up on cardboard or plastic, the blog I read said to use Dixie cups which I bought but never used. I sprayed primer on the backs then fronts. Then separated them into blue (BM Hale Navy) or white (SW Whitetail). The first time old paint stuck to the piece I was flipping over I realized what the Dixie cups were for (insert face palm). Two coats for the blue cabinets (2 days work) and three coats (3 days) for the white allowing almost a day of drying time between painting and installation they were done. PTL, I was tired of cleaning out that paint sprayer after every single use- or it would clog up with hour old paint.

Home right Finish Max paint sprayer. Love it, except the overspray and cleanup.
Cabinet fronts installed and appliances delivered.

I still need to make a shelf for that bottom part of the microwave cabinet but that’s gotta wait. My Dakota sink and faucet was delivered- let’s say after a couple weeks of using the bathroom sink to wash dishes- I was a little excited to get them installed.

Sink/faucet delivered!

I made cardboard templates from their packaging for my countertops and then the plumber came by to bid the job and cut down an a vent for countertop installation. He informed me that the sink we bought would never fit- no normal sink would. The cabinet “needed to be scrapped“ – which after all my hard work was like a sledgehammer to my pride. I cried, a lot.

Cardboard countertop “pattern”

So after Eric talked me down, I decided to wait til tomorrow before I did anything foolish. I dreamt of solutions and woke up determined to save this cabinet and not have mix matched ones or to blow a hole in my budget.

Cabinet reconfiguration: whole cabinet had to be moved out 2 inches to accommodate the sink. which required some creatively placed 2x4s.

Meanwhile, I was also busy staining/sealing the Birch butcher block countertop (from Home Depot delivered to my doorstep). I read a blog post on how someone naturally stained theirs using a vinegar/stainless steel combo that had sat for a couple days. I followed the recipe exactly and was not thrilled with the results (I cried then too) so the next day I added a little of my favorite stain to the mix.

Birch butcher block countertop stained with steel wool/vinegar mixture
Day later and small bit of stain added to mixture.

The woodworkers from Precision Construction and Roofing (Justin Balthazar & Derek) arrived and got to work reinforcing the cabinets and even used my templates to cut & mount the countertops! They were fantastic, detailed oriented and worked very quickly for the scope of work. I highly recommend.

Woodworkers hard at work.
Pretty sad about the damage I inflicted on my lower blue cabinet to make the sink and dishwasher flush but that’s what touch up paint is for…
Touch ups, and more touch ups.
Countertops installed!

The plumber made it back the following morning and hooked everything up. It’s so nice to have a working kitchen and it looks much better than the original. Next kitchen project: tile the backsplashes.

I think what I’ve learned, it’s ok to cry. Jesus wept. Just have faith, get up the next morning do something and the world won’t seem so bad.

With love, DK

Sheltering in Place

Whoever dwells in the shelter of the Most High will rest in the shadow of the Almighty… Psalm 91

Last week we were to go to Orlando for spring break. That didn’t happen. When Universal Orlando shut down we didn’t know what to expect in Florida. In a seeming whirlwind Eric and I decided to spend “spring break” in Kansas working on the house. We loaded up a trailer of little stuff (to clear up our Tennessee house for listing pictures) and headed west.

It was a very productive week and a blessing to have my family here and helping through this “Reno project” that’s tested me mentally, physically and emotionally. Eric did so much and still had to login and work a few hours each day. Until we had internet setup here he had to find creative places to login with so many businesses closed.

In his spare time, Eric setup two new garage door openers, cleaned out the garage- taking multiple loads of construction debris to the dump, installed the dog door & built my TV/fireplace frame (more about that later). He even found toilet paper at the local Ace Hardware!

Eric and Skylar are now back in Tennessee and I’m still here with Ivy for another week to work- provided I will be allowed to travel in a week (I’ve heard Nashville is on lock down for the next 14 days).

Triaging the house from most important “to dos” so other projects could get done was the order of everyday- most of the time it didn’t make any sense and I would jump from one project to another without truly completing them… hence why you haven’t gotten an update until now.

Do you remember that weird opening in the living room wall with the electrical box hanging out?

Evidence of chaos

Fixed it. Well, repurposed it. I removed the electrical box (that’s also connected to a switch next to the front door) and ran the wires back through the wall and up to the side of my front door. After what seemed like hours fighting the siding with cold fingers I replaced the original fixture and got my second outdoor light mounted.

Then I insulated and covered the empty gap with some leftover paneling I found in the garage. And painted. And painted, and spackled, and caulked walls & added trim and did some more painting.

(Before) After primer, texture & trim
After (still needs baseboard trim).
Wall color is SW French Cream.
Top “After”/ Bottom “Original”
(Before) After primer, texture
After (still needs trim)
Before) After primer, texture
After (not sure I like the light fixture, I think it’s too big for the space and the doors will be painted, eventually).

Meanwhile, Skylar and Ivy have been busy at work on their own rooms. Well, I helped on Skylar’s room and then let them tackle Ivy’s on their own (with minimal supervision).

Skylar’s room (before)

They took out closet sliding doors, removed nasty old carpet & padding, cleaned the floor of nails, swept, changed the light fixture, painted and laid vinyl flooring.

Time lapse “Ivys room: part 1“
Time lapse “Ivy’s room: light fixture installation aka playing with electricity”
(LED flush mount lights are from Ikea!)
Still needs trim but it’s progress!

I have so many things yet to do. Until the next update, stay safe, stay home.

With Love, DK

Wagging my tail

Grandma Eaton and Gracie II

I’d be wagging my tail too, if I had one.

I have gotten so much done (even though I’ve stayed two days more than I planned). Enough time to work & hang out with grandma (my Dad’s mom) and her new puppy on the farm. She said she bought it for Uncle Dale because he needed a hunting buddy – that is yet to be determined. Gracie at 4 months loves to retrieve sticks and balls so it’s at least in her genes to be a good farm dog.

Another reason why moving back to the county will be welcomed. Grandma has said time and again that she “can’t see, can’t hear but is otherwise in perfect health” but I’m thankful to know I’ll be near again soon even if just to escort her to Sunday school class.

When I got back from my Colorado ski trip, I spent a few long days at the cottage. I finished up trim pieces and the range hood and started to prime everything.

After the priming, I used my new HomeRight Finish Max HVLP Paint Sprayer and sprayed the built-in and lower cabinets with enamel in BM Hale Navy.

Time lapse of spray painting the Built-in

After covering the upper cabinets, I sprayed the lowers.

And then covered the lower cabinets (that part not pictured) and sprayed the upper cabinets with enamel in SW

While waiting for cabinets to dry, I mixed primer & texture and tried to cover the walls in the living, dining, and kitchen. Although it makes the space look much lighter and bigger, it revealed how much more caulking, spackle, and trim pieces still have to install. Yea.

I’m heading home tomorrow but I’ll be back in a couple weeks to continue the journey. Gracie will be excited to see me (must remember to bring some used tennis balls back).

With love, DK

Stuck in a rut

Many are the plans in a man’s heart but It is the Lords purpose that prevails Psalms 19:21

It’s been a rough couple days out here in Kansas- attempting to renovate the “craftsman cottage.” I had so many plans and an itinerary down to the hour (almost) to be ready the next visit. In March my handy brother, Caleb, was coming out to bring my porch posts and help me cut/install my countertops.

I won’t get it all done this time and I’m struggling with the feeling of being behind and the worry that bogs me down like Kansas mud. But Gods plans prevailed even in the chaos and my “ditchy” attitude. This week he placed me where I was suppose to be and with the people he wanted me with and those moments were divine interactions.

I arrived Friday afternoon around 4pm after waking up at 3am. Unable to sleep I set out the 12+ hours from Nashville. Friday evening I got a few small things done before heading out to the farm: turned on the water, changed out the deadbolt for an easier automated one and unloaded my car (which took the longest).

On Saturday, I got to the house early and made great headway on “kitchen demo day.” Below are the before photos.

Before
Before
Before

I started by pulling down upper cabinets above the bar and above the refrigerator, removed the refrigerator, stove and the countertop and cabinet doors. Then I used a circular saw and cut down the bar to countertop height.

Then, where there was only one sad low hanging kitchen light I installed 3 of 4 Slim LED flush mount lights

Sunco Lighting 4 Pack 6 Inch Slim LED Downlights (Sunco Lighting 4 Pack 6 Inch Slim LED Downlight with Junction Box, 14W=100W, 850 LM, Dimmable, 3000K Warm White, Recessed Jbox Fixture, Simple Retrofit Installation – ETL & Energy Star https://www.amazon.com/dp/B07L581LCK/ref=cm_sw_r_cp_api_i_KrZvEb7R7SWDD).

It was simple – after a couple of starter drill holes, I used a sheet rock saw and cut out a 6” hole and then wired the lights together according to the directions. To mount them- they have little spring feet that fit right into the drywall and do not need actual housing boxes.

(Late) Saturday night Grandma took out her hearing aids and I got locked out of the house (spent the night on the floor of the cottage – it was pretty rough because I’m not as young as I once was). After church on Sunday afternoon and most of Monday I worked on configuring my microwave cabinet reusing some of the doors from the upper cabinets that I pulled down.

Monday evening it raining so terribly I doubted that I could make it back the dirt road to the farm so I bought an air mattress to camp out overnight.

This ain’t our “Bonnaroo glamping setup” Sad face. Although it allowed me to be up at 6am and be working on my projects.
Almost finished piece. It still needs some underlayment and trim before it’s ready to paint.

Needing a shower and to desperately brush my teeth, I pushed on. For what seemed like hours, I drew and redrew a configuration for the corner range/range hood area. I almost lost my cool and ditched it all more than once. Oh, and it’s now snowing outside.

At the end of the day Tuesday all I really wanted was a good meal and a warm bed. Even with the snow, this Southern heart decided to try to make it back to the farm before dark when I felt like the snow had let up for a time. It really wasn’t bad, except for the drift that I slid into. Thank God for Myron & Rachel Keller who got me out, fed me and put me up for the night (since I wasn’t getting back to the farm and the possibility of getting stuck again on the way back to Plainville was less than appealing).

Stuck in the snowy ditch

After a great night of sleep and some bulletproof coffee (thanks to Rachel), I had plenty of energy to wrap up for the week and left for the farm before dark. Below is my video recap of my progress.

Video summation of this week’s progress.
Mud driving, but I made it back to the farm.

Lord please let me get out to the blacktop without issue tomorrow.

With love, DK

Shut the window box up

I would never say such a thing.

However, last night after finishing my “garage project” covered in sawdust & stain, a verbal run-in with one of my daughters friend’s parents was the last thing I expected and I was done in every sense of the word. I think God puts difficult people in our lives to remind us that he still loves us and has compassion on us even when we act like brats (I am referring to myself).

Bless the overprotective parent. “Bless the one who has no one. Bless what we call insignificant and which you call magnificent. Bless it all and love what only you can love: the ugly, and abandoned and unsanitary in the wash of humanity upon which you have nothing but a gleaming compassion when we have none” -Nadia Boltz Weber (https://nadiabolzweber.substack.com/p/im-dabbling-in-compassion)

My garage project this week was making my own shutters and window boxes for the “craftsman cottage” in Plainville! Woot.

After drawing up a sketch and adding approximate costs into my budget I rolled to the local Home Depot and got the guys there to cut my boards to size (or so I thought).

Helpful Home Depot employee 😁

Bringing all my materials home (including 1 1/4in decking screws that I failed to mention), I first stained and then assembled my shutters.

Here’s my video on how I made the shutters! https://www.youtube.com/watch?v=TUZgE-sq5OE&feature=share

I think they turned out pretty well. (I made 8, only 5 are pictured here because the others are leaning in other random corners in my garage that you don’t need to see)

The window boxes were so simple.

Three sides the same length of the window base cut from cedar fence pickets and the end caps cut from left over picket. I made a time lapse video of that one because they’re so simple I thought it might be boring to watch me too long.

https://www.youtube.com/watch?v=tPWdNEfuPKU&feature=share

I stained the front and sides and a little in the inside with same American walnut as the shutters. Once I get them to Kansas, I plan to staple plastic drop cloths in the inside to line them and drill holes for drainage.

Next week I head to Kansas with a full itinerary.

With love, DK

Painted Ceilings

The heavens declare the glory of God; the skies proclaim the work of his hands. Psalm 19:1

I’ve been working with my hands this weekend and although I’m happy with my efforts so far it’s nothing in comparison to the beauty my surroundings. I’ve missed the sunsets here.

The goal for this visit was to get all the ceilings painted. I failed. The dining room and kitchen ceilings are still their smoky yellow selves.

This process is definitely pushing against my struggles with perfectionism. Not that everything has to be perfect but my mind constantly considers what others would think of my work and progress. Too messy? Too slow? Should I have ripped it all out and started from studs?

Not sure there’s an quick answer, but hopefully I’ll learn something through this process.

I laid the plastic floor covering and started prepping the walls/ceiling. Upon finding molding pieces and missing sections near the ceiling, I decided I needed to take down “the crown molding.”

After realizing it wasn’t ribbed paneling and after paint it would look like a regular wall – all of the molding pieces needed to go. So they came down with the help of a little pry bar and spackling followed in all the holes- lots of spackle (I like Dry Dex -Dry Time Indicator, it starts pink and dries white).

On to ceiling paint. I used Kilz2, a white primer and started with a roller- this rockstar of a paint stick. It’s called, HomeRight PaintStick EZ-Twist (bought mine on Amazon). You simply assemble it, put the port in the paint tube, suck up the paint by pulling the wand back, close the valve and start painting twisting the wand to expend more paint on the roller. Easy peasy. Cleaning it is pretty easy too.

It took me two days to roller the bedrooms, bathrooms, the hallway and living room ceilings. Then I went around the top of the ceiling/wall and used a spray in foam for deep cuts and latex caulk after it dried to smooth it all out. I wore rubber gloves after the first time I peeled caked caulk off my hands. Duh.

Video update: https://youtu.be/nSFgcZfNWI8

Exhausted. I’m heading home in the morning, but I’ve got a few things with me to work on at TN home and more to do next month.

With love, DK

Home, Home on the Range

Surprise, Surprise, we bought a house in Plainville, Kansas.

Why? To simplify. To simplify life down to its essence. To be able to focus on what really matters in our life. We don’t need the $400k house on a hill and our kids don’t need the pressure of keeping up with “the Jones” even if we can afford it.

It gets deeper than just relinquishing material possessions but we will get into that in the coming weeks/months as I begin the remodeling process of our purchase. From now til June I will be spending about a week a month out in rural America working on remodeling a 1983 modular home. I’m a little more than crazy but I have a vision that it will turn out to something we can call home for at least the next 4 years.

https://www.youtube.com/watch?v=Rgv5Zo5Qg7U&feature=share

So much for a professional start hope y’all will forgive my amateur video skills… follow the below link to watch the “Home Tour (before)” on YouTube.

https://www.youtube.com/watch?v=iFl6CHF7daU&feature=share

So we’ve got some work to do. Good news is that’s it’s getting a new roof and gutters very soon and that will not come out of my renovation budget. My initial reno budget is approximately $10k and I’m hoping to keep it under $15k so I can get that hot tub I really want. Wink. Wink.

God has bigger plans in store for us, as individuals, as a couple and as a family. I hope you’ll be following me through this process.

With love, DK

Design a site like this with WordPress.com
Get started